Monday, October 28, 2013

Report on Cornhusk Dolls & Wreath Workshop

by Carol Kagan, Franklin County Master Gardener

Cornhusk Dolls from Workshop (L) and Samples (R)
On Saturday, October 26, the Master Gardeners of Penn State, Franklin County held a Cornhusk Doll and Wreath Workshop and, while there were 15 attendees, none were children. 

Small cornhusk dolls (5" high) made by Carol Kagan
Master Gardener Charlie White led the cornhusk doll making. "Adults are just like children and a pleasure to work with," he chuckled, "plus they help clean up!"
Master Gardener Charlie White Making Cornhusk Dolls
Krissy Castillo with Her Doll


Krissy Castillo, Greencastle, attended after an invitation from her friend, Linda Keefer. They chose to start with making the dolls. Keefer said "small ones [dolls] could be used on Christmas trees" and others agreed that would be pretty. Keefer, also from Greencastle, took the Master Gardener Victory Garden workshop this year and noted she really enjoyed it.


Finished Sample Wreath


Master Gardener Barbara Boyer led the wreath-making with a brief demonstration of the very easy technique. Cornhusks were stripped and soaked then torn into strips. The strips were tied with a simple tassel loop around a metal wreath ring.


Coat Hanger Wreath Frame


Although there is a link below where the crimped wreath rings are available, any simple wire ring from a craft store would do. Why buy? If you still have a wire coat hanger, form it into a circle and use the hook as your hanger.


Master Gardener Barbara Boyer Led Wreath-Making


Boyer discussed and displayed a number of natural elements that could be used for embellishments including gum tree pods, dried cones, milkweed pods, and dried flower heads.


The availability of Indian corn purple-hued cornhusks added to the unique and different styles of both the wreaths and dolls. Some dolls had hair of dried cornsilk tucked under their bonnets and others had purple aprons and hats. There was a mix of purple and natural cornhusks on most wreaths. While some chose to use forks to shred the husks to a more fringed look, others left the husks wider and fuller.
A fringed look

Currently a Master Gardener trainee, Ruth Young from Blairs Mills, noted that she had a metal door and thought this wreath would "be light enough to hang on it." While Kathy Rodgers and Theresa Reichard, both from Waynesboro, like that it will "fit between the front door and storm door."
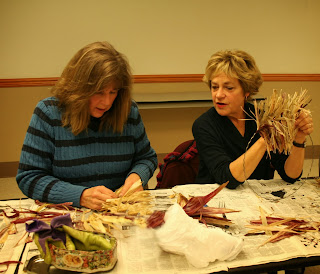
Kathy Rodgers (L) and Theresa Reichard work on their wreaths.
Working side-by-side, Erica Hildabridle and daughter Pam, Chambersburg, were making wreaths. Pam is studying to be an AG education major at Penn State (hmmm.. possible MG recruit?) and won't be putting her wreath on her door at college. She plans to give it to her mother.

Erica Hildabridle will put her wreath on the door until the Christmas season. She likes the natural look of the cornhusks making "changing the embellishments" for each season easy.
Cornhusk Flower Embellishment

Most wreaths were headed for the makers' front doors but Jane Weigle, a Master Gardener from Shippensburg, was making a gift. "My daughter just gave birth," she said. "She likes crafts and I thought I would make one for her since she doesn't have the time right now."
Barbara Boyer did a good job on her first workshop.
Boyer noted this was her first workshop and said, "It went well and I enjoyed it and everyone seemed to enjoy it, too." She was able to send home plenty of corn husks, originally gleaned from her brother's farm so expect to see plenty of cornhusk wreaths and dolls around the neighborhood.

Photos: Carol Kagan

For more Information:

Cornhusk Dolls
Craft Revival: Shaping Western North Carolina Past and Present- Cornhusk Crafts
Children's Discovery Museum: Making Cornhusk Dolls

Cornhusk Wreaths
Make and Takes: Cornhusk Wreaths (Using a green styrofoam form from a dollar store)
Martha Stewart: Cornhusk Wreaths (Very different with dyed husks)
Chickens in the Road: Cornhusk Wreath (different technique and very rustic look)

Crimped Wreath Rings
Maine Wreath Company (online)

Saturday, October 19, 2013

The Bees in Elevator B(ee) - Buffalo NY

By Carol Kagan, Franklin County Master Gardener

We went north to see the elk, scooted up to Niagara Falls and, in support of my October photo club assignment – SILOS – stopped at Silo City in Buffalo, NY.

It turns out this is a collection of grain elevators on Childs Street owned by Rick Smith of Rigidized Metals Corp. who dubbed the site "Silo City." A number of art festivals and events are held here.

Not really silos - but then there’s Elevator B(ee).
Elevator B
Silo City in Buffalo NY: Excerpts from Elevator B @ Hive City, by Queenseyes in Buffalo Rising

"[Rick Smith] came upon a massive bee colony lodged inside the boarded up window of one of the office buildings. In order to see the transferal of the bee colony from the office building to another site at Silo City, it was decided to bring professors and students from the University at Buffalo School of Architecture and Planning's Ecological Practices Research Group together to participate in a competition. The [winning] team came up with the concept of building a giant metal hive using plates fabricated at Rigidized Metals.
The design would allow for the bees to be kept inside a wood and glass compartment (referred to as a 'Bee Cab') that would travel up and down a 22' vertical structure. The crank driven 'Bee Cab' would give the beekeeper access to the colony so that he/she could tend to the bees as needed. The bee colony would also be locked securely, away from danger and the natural elements, while the individual bees would be allowed to pass through small cut-outs in order to come and go as they please. Positioning of the sun would be crucial (sun shading).

Looking up into the 'Bee Cab'
Another incredible feature actually allows viewers to walk inside the structure to view the bees when the 'Bee Cab' is elevated to the middle or top. In essence, the project would become an outdoor learning lab."

Here’s a video with more information about this unique solution to preserving pollinators.


For more information check these links:

Buffalo Architecture and History: Silo City


Sunday, October 13, 2013

Trick Bulbs Now for Winter Treats

by Carol Kagan, Franklin County Master Gardeners
Orange Tulips (DeeAnne White)
Before you start sewing sequins on the princess costume or the “S” on Superman’s chest in preparation for the chanting of “trick or treat,” think about one or more winter treats for yourself because now is the time.

What treats? Beautiful blooms from bulbs which have been made to blossom. Winter is coming and enjoying a bright flower inside while it is gray, cold, and icy can bring forth a “Bah, humbug to you, Old Man Winter!”

While many know this process as forcing bulbs, Art Wolk, award-winning flower exhibitioner and author of books on this topic, likes to call it bulb enticing. Whatever term you use, it refers to making a plant bloom ahead of its natural schedule.
Paperwhite Narcissus (L: Clara S. & R: Debra B.)
What and When to Plant

Often for sale as kits this time of the year, paperwhite narcissus and amaryllis are the easiest for beginners. Dr. Robert Nuss, Penn State horticulturist, explains that these bulbs have been prepared for flowering before they are ready for sale.


Red Amaryllis (Univ. of Minnesota Extension Service)
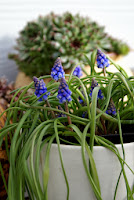
Other spring-blooming bulbs such as crocus, tulips, daffodils, and iris are popular. Don’t overlook smaller bulbs such as snowdrops or grape hyacinths for a winter treat. A container-grouping of them is convenient for the breakfast table or corner of a desk. All these bulbs must have a cold period (35-48° F) of about three months to initiate bloom according to Kate DeSimone, Penn State Master Gardener.

Grape Hyacinths (Jacki-Dee)

Typically, bulbs you want to bloom during the end of year holidays are planted the last week in September; however, bulbs planted later will still bloom during the gray days of winter. Consider planting several batches several weeks apart for continual bloom in the future.


Pink Hyacinths (Tomy Lees)


So, if you want to see Dutch hyacinths in February, plant them around mid-November allowing 11 weeks to chill. Shoots should start to emerge the first week in February. The chart below shows the chill period for commonly grown bulbs.

Chill Chart (George Weigel)
How to Plant for Cool Storage

Bulbs can be grown in soil, a pebble filled bowl, or in water in a specially shaped bulb vase. To grow in soil, use a clean container with good drainage. Don’t use garden soil. Use a mix that drains well such as a mix of soil, sphagnum moss and perlite or commercial “soil-less mix.

Planting a pot (Iowa State Univ. Extension Service)

Fill the container three-quarters with the mix and sit the bulbs close to each other, root end down. If the bulbs have flat sides, turn these to the outside of the pot as that is where the largest leaf will come up. Add soil mix around the bulbs leaving the “noses” exposed. Water gently but thoroughly. Don’t let the soil dry out but don’t overwater.
 
If you are going to plant them in a pebble filled bowl (with water) or a bulb vase, you can pre-chill the bulbs in an open paper bag until roots begin to show. Then place them in the container and continue to chill for the remaining chill period, gently replacing the water every few days with lukewarm water. Check the Purdue Website for instructions on forcing bulbs in water.

Pebbles or glass vase with water (Purdue Ext. Serv.)

 Paperwhites have a tendency to flop over so you might want to put them in a tall glass container, clear to see the roots or fill with shells or other objects.

North Carolina State Extension Service (Michelle Pham)
 
Simone adds that bulbs may be chilled in any cold, dry location such as an unheated garage or crawlspace with temperatures around 40° F. If storing in the refrigerator, don't store in the same cooler as fruits or vegetables, which give off ethylene gas that can harm the flower inside the bulb. Some bulbs are poisonous, so don't put them in the refrigerator if you have small children.

Bring in the Blooms

When the chilling period is over, gently remove a bulb to check its growth. When you see roots and about 2 inches of shoot growth, the pots are ready to bring into the light.
Bring the pots into a cool location (55-65° F) with good sunlight. Keep the soil moist and turn the pots slightly each day to get uniform growth. Flowers should bloom within 2-3 weeks. To extend the blooms, keep them away from heat sources and move them to a cool area at the end of the day, bringing out for display in the morning.

Amaryllis (La Fattina)

Enjoy the treat of spring color during the dreary days of winter as you read through your garden catalogues. When the bloom is over, bulbs are usually discarded since forcing uses up their energy reserves so use their inspiration when planning the spring garden.


For more information check these links

Penn State Extension: On Gardening-Flowering Bulbs Can Brighten Winter
Penn State Extension: Forcing Bulbs
Penn Live: How to force bulbs to bloom inside in winter by George Weigel
University of Missouri Extension: Forcing Bulbs for Indoor Bloom
University of Minnesota Extension: Forcing Bulbs for Indoor Beauty in Winter
North Carolina Cooperative Extension Service: Home Forcing of Hyacinths
Iowa State University Extension: Forcing Flower Bulbs
Alabama Cooperative Extension Service: Force Bulbs for a Winter Bloom
Purdue University Cooperative Extension Service: Forcing Bulbs for Indoor Bloom (excellent resource for forcing in bulb vases)

Wednesday, October 2, 2013

Frost, Freeze and Green Tomatoes

by Carol Kagan, Franklin County Master Gardeners
Frost on the Pumpkin (WKTY-TV, Lexington, KY)
We are fast approaching the last frost free date of October 15 in Franklin County and many home gardeners, eager to either have homegrown tomatoes for Thanksgiving or loath to discard any possible foodstuff, are looking at their green tomatoes.
 
FROST VS. FREEZE

Frost, “killing frost,” freeze warnings, a “killing freeze” - what is the difference? In casual conversation the terms frost and freeze are often interchangeable but there is a very real difference. Frost and freeze are two distinct phenomena. These terms take on significance when they are associated with the growing season.
North Carolina State
FROST

According to the National Oceanic and Atmospheric Administration (NOAA), frost is the formation of thin ice crystals on the ground or other surfaces in the form of scales, needles, feathers, or fans. Frost develops under conditions similar to dew, except the temperatures of the Earth's surface and earthbound objects falls below 32°F. A frost advisory is issued when widespread frost formation is expected over an extensive area. Surface temperatures are usually in the mid-30’s. If a frost period is sufficiently severe to end the growing season (or delay its beginning), it is commonly referred to as a "killing frost."

 Dr. Katharine B. Perry, North Carolina Extension Service, has compared frost and freeze conditions for protection of horticultural crops noting frost and freeze protection methods are based on preventing or replacing radiant heat loss.
Frost on Lettuce- Gary Bachman, Mississippi State University

Because frost is primarily an event that occurs as the result of radiational cooling  - heat loss at night - it frequently occurs with a thermometer temperature in the mid-30’s. A radiation frost happens when a clear sky and calm winds (less than 5 mph) allow an inversion to develop. An inversion occurs when the heat radiating from the earth rises and causes the cooler air above to be pushed down, and temperatures near the surface drop below freezing.
North Carolina State University
Covering plants before the sun sets may be protection from frost as this can help retain heat near the plants.
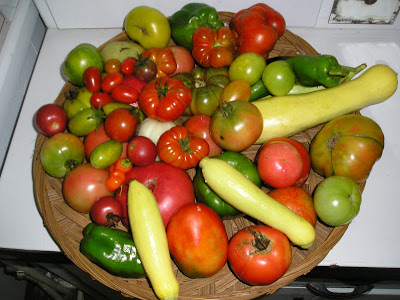
Frost damaged tomatoes, squash and peppers-
Gordon Johnson, Kent County, Delaware
FREEZE
According to NOAA, a freeze is when the surface air temperature is expected to be 32° F or below over a widespread area for a significant period of time. Use of the term is usually restricted to advective situations or to occasions when wind or other conditions prevent frost.

Dr. Perry explains than an advective, or windborne, freeze occurs when a cold air mass moves into an area bringing freezing temperatures. Wind speeds are usually above 5 mph and clouds may be present. Attempts to protect plants are very limited under these conditions.

 A "killing freeze" may be used during the growing season when the temperature is expected to be low enough for a sufficient duration to kill all but the hardiest herbaceous crops.


According to NOAA, freeze warning are issued during the growing season when surface temperatures are expected to drop below freezing over a large area for an extended period of time, regardless whether or not frost develops.
Green tomatoes - Carol Kagan
GREEN TOMATOES

Tomato Flower-Carol Kagan
We are less than two weeks away from the first average frost. Since it takes about six weeks for a tomato to go from flower blossom to ripe fruit, you should have pruned back your tomato plants in mid-September (cutting the growing tip off all the vines and any new blossoms to redirect the plant’s energy toward ripening up the existing fruit).


Oops! Okay, you were enjoying the weather and forgot. Now what?
There's always fried green tomatoes or you can store them to ripen up later.

Pan-Fried Green Tomatoes (From PS WPSU Local Food Journey)

Ingredients:
   2 large green tomatoes       1/4 cup bread crumbs
   1 egg salt                            1/4 cup milk black pepper
   1/2 cup all-purpose flour    Peanut oil for frying
   1/4 cup cornmeal

Directions: Slice the tomatoes 1/4- to 1/2-inch thick.

Whisk together the egg and milk. Place the flour and a little salt and pepper into another bowl. In a third bowl combine the cornmeal, bread crumbs, salt, and pepper.

Bread the tomatoes by first dusting them with flour, then dipping them into the egg, and finally coating with the bread crumb mixture. *

Heat the oil (1-2 cups) in a large sauté pan over medium heat. Cook until the tomatoes are golden brown on both sides. Drain on paper towels.

* An online blog (Tadpole's Outdoor Blog) suggests that these can be put in a single layer, frozen and then stored in a plastic bag in the freezer to use later. Perhaps fried green tomatoes for Christmas!
Tadpole's Outdoor Blog

STORE TO RIPEN
Pick and store your green tomatoes and let them ripen up. Ron Wolford, University of Illinois Extension horticulturist, notes that green tomatoes can be harvested before a predicted frost.

“You can tell when a tomato is nearing maturity by its light green, almost translucent, appearance,” according to Barb Fick, horticulturist with the Oregon State University Extension Service. “Tomatoes that are not in this 'mature green' stage won't ripen.”


Fick notes that a green tomato is mature if its interior is yellowish and the tissues are gelatinous, or sticky, when the tomato is cut. Mature green tomatoes also have a pink or reddish tinge on the blossom end.
Check for maturity by cutting a green tomato in half. If the pulp filling the compartments is jelly-like, it is mature green. In immature green tomatoes, seeds are easily cut through and the jelly-like pulp has not yet developed.


Checking maturity in green tomatoes - Courtesy of Lowes.com
Wolford recommends removing the stems, washing and drying the fruit. Wrap each tomato in newspaper and place them in a single layer on a shelf or in a box. You can also put them in deep straw or just lay them in a box so that they are not touching. Check tomatoes every few days and discard any that show signs of rot.
Wrap tomatoes in newspaper - Carol O'Meara,
Colorado State Univ. Extension Service
Tomatoes will ripen satisfactorily in the dark, according to Fick, and sunlight is not needed; however, temperature is important. Storage temperature should range from 60 to 70 degrees. They will ripen over a period of three to four weeks.
Picking and storing the mature green tomatoes in mid-October means there's a good chance you can have some tasty, home-grown tomatoes for the Thanksgiving celebration.

For more information, check these links:

Cornell Cooperative Extension, Chemung County: Understanding Frost

Mississippi State University: Winter’s frost, freeze can damage landscape

Penn State WPSU Local Food Journey: Field Notes and A Recipe for Pan-Fried Green Tomatoes

PSU Preserving Your Harvest - Tomatoes

Colorado State University Extension Service: Ripening that Huge Crop of Green Tomatoes (Carl Wilson, Colo. State Coop Extension Agent)

Cornell Cooperative Extension, Chemung County: Guidelines for Harvesting Vegetables
Compiled by Eric de Long